Estonian Cast-On
 1 1 |
 2 2 |
 3 3 |
 4 4 |
 5 5 |
 6 6 |
 7 7 |
||
| Klik op afbeelding voor vergroting – Click to enlarge images | ||
De Estlandse opzet bestaat steeds uit twee steken die samen aan de voorkant van het werk (figuur 7) een lusje vormen. Dit geeft vooral een mooi effect bij de boordsteek van twee recht / twee averecht.
Je start met het maken van een schuiflus, daarna maak je een opzetsteek zoals hieronder beschreven wordt, daarna een traditionele opzetsteek (continental cast-on) en vervolgens een opzetsteek de tweede steek.
Start dus nu met het maken van de schuiflus.
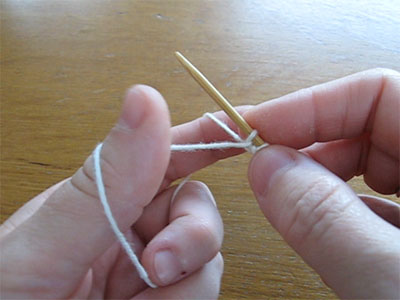
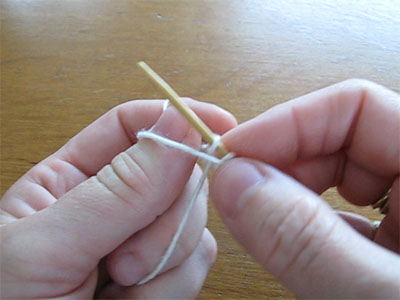
- Hier zie je die schuiflus. De draad over de duim is het korte stukje draad, de draad om de wijsvinger komt van de bol.
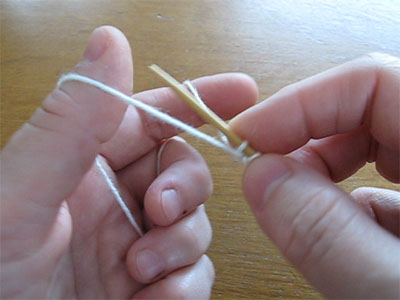
- Laat nu de lus om de duim los en steek je duim er andersom in.
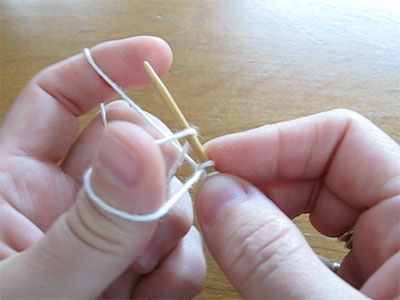
- Neem met de rechternaald het achterste stuk van de lus om je duim op.
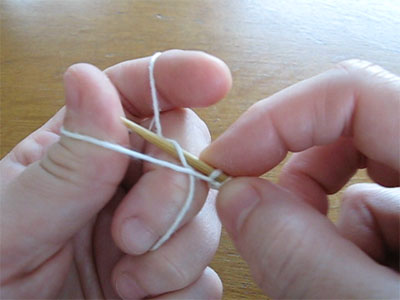
- Maak een steek door vervolgens het lusje om je wijsvinger op te nemen.
- Trek de draden losjes aan.
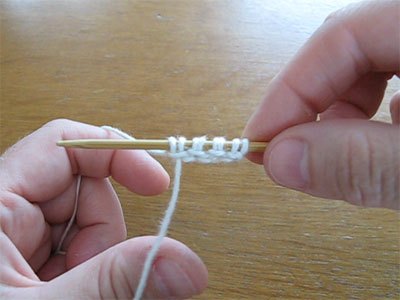
- Hier zie je het effect van de handelingen.
- Op de voorkant van je werk zie je mooie lusjes die paren van twee steken vormen.
Maar je kan natuurlijk ook gewoon de video bekijken…….. 😉
The Estonian cast-on exists of two stitches that together form a horizontal loop on the front of the knitting (figure 7). This give a nice cast-on when you use a border stitch of knit two / purl two.
You start with making a slipknot, then you make a cast-on stitch like described below, then a continental cast-on stitch and than another stitch like the second stitch.
Start with making the slipknot.
- Here you see the slipknot. The thread that is around your thumb is the short end, the thread around your indexfinger comes from the ball.
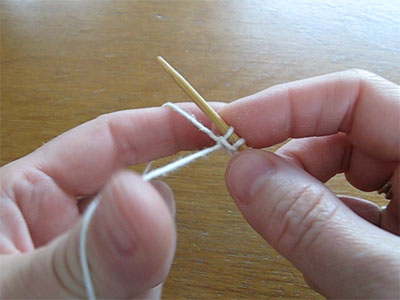
- Now let the loop around your thumb loose and put your thumb in the other way around.
- With your richt needle you scoop up the backloop around your thumb.
- Make the stitch by scooping up the loop around your index finger.
- Thighten both pieces of thread loosely.
- This is what you get.
- On the front of your knitting nice horizontal loops are to been seen. They form sets of two stitches.
But of course, you can also see the video…….. 😉